If you’re doing installs for signs or vehicle wraps, you clearly understand how proper prep affects the results.
There’s just one issue.
Clients are terrible at completing homework. You handed them a one page checklist that lays it all out. Why the hell can’t they just follow instructions?
Those important steps you suggest for a smooth install process are often forgotten or overlooked by your clients.
So what’s the solution?
Despite what you think, they’re probably not actively trying to screw this install up. Odds are they probably got busy and forgot.
A good solution is to call, email, or text the day before the install to give them a gentle reminder that:
You’re coming to install their awesome stuff tomorrow.
There’s a few things they need to get done to ensure a smooth install.
They need to have final payment at the ready.
But here’s the thing.
You’re doing 2-3 installs per day. You don’t have time to remember this for every install and this ain't exactly a money making phone call.
🛎️ Ding Ding!
We've got a perfect candidate for automation.
Tools Involved
Here’s the three tools involved in this workflow.
Zapier
(Starts at $20 for basic plan)
Google Calendar
($0)
Twilio
(Starts at $0, varies by usage)
Before you get started it will be helpful to setup accounts at all three.
How to Automatically Text Customers a Reminder
Step 1. Google Calendar
I've seen a lot of shops using Google calendar to manage their production or install schedule.
Google Calendar is stupid simple to use and easy as pie to add new installs and manage dates for existing installs.
While you can add pretty much anything to a Google Calendar event, you’re going to be a little strict about how we structure things.
It's best to setup a standard convention and use that every single time.
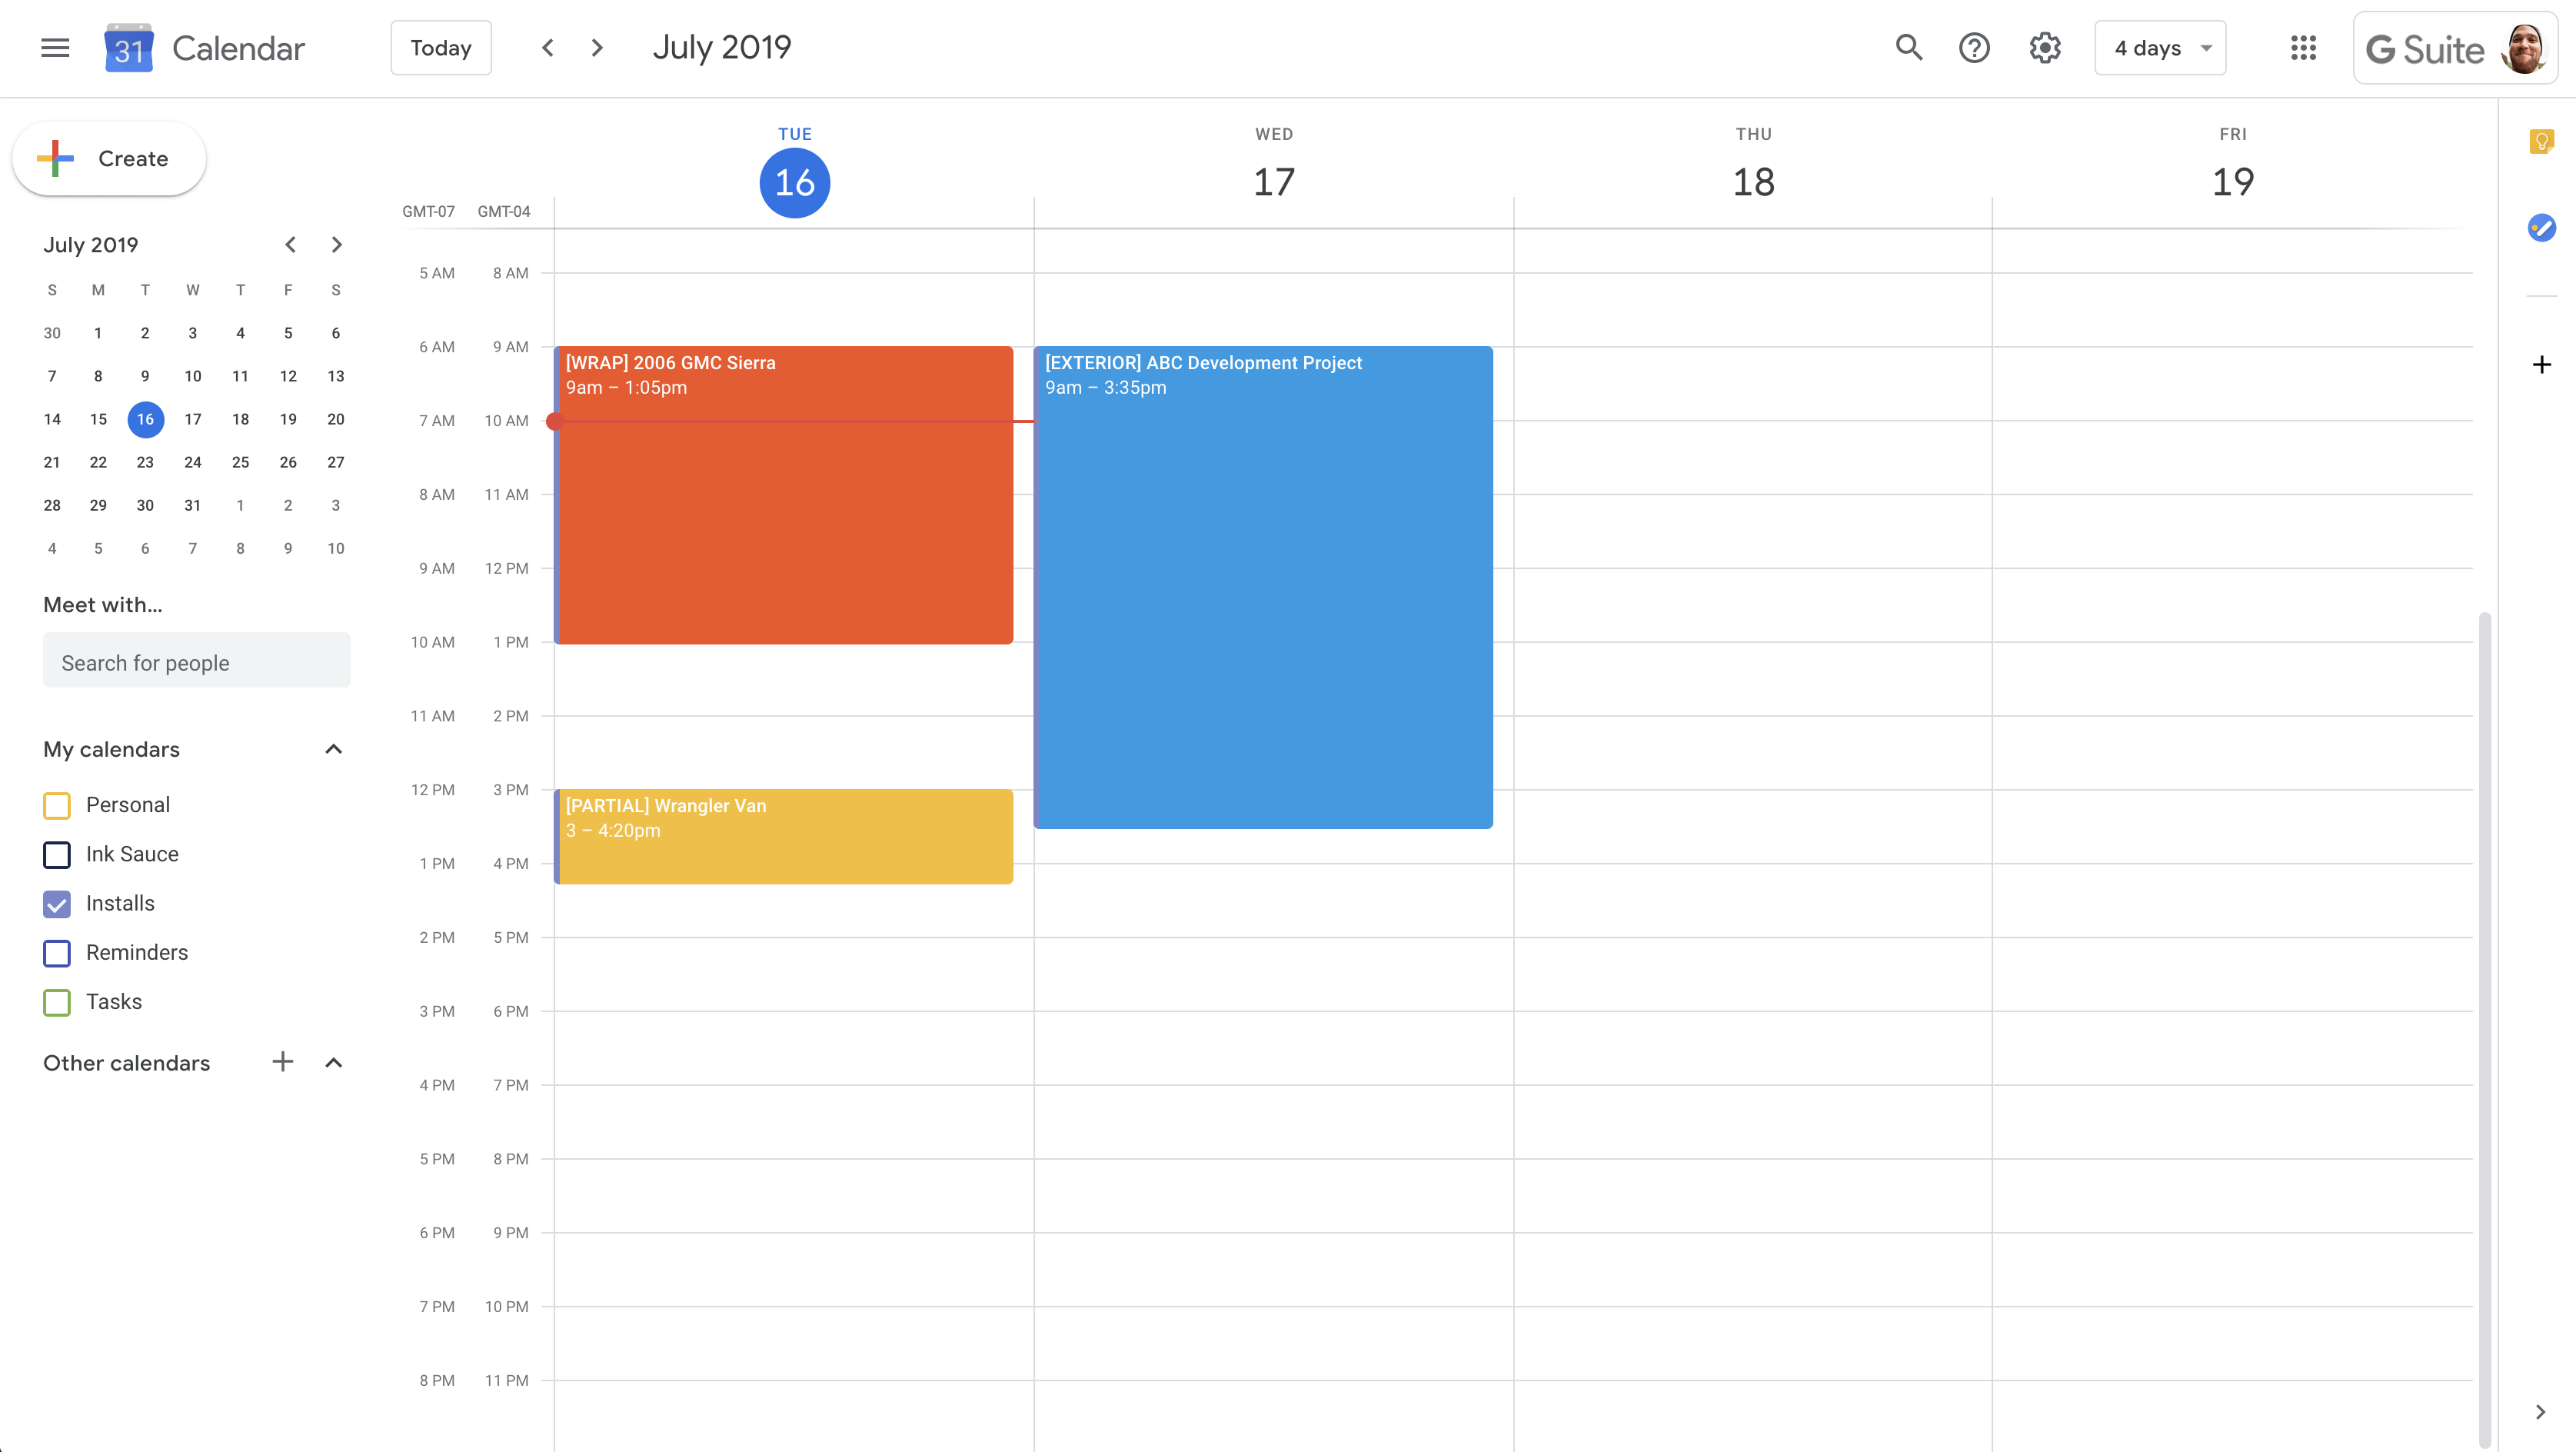
Create a new install event inside Google calendar.
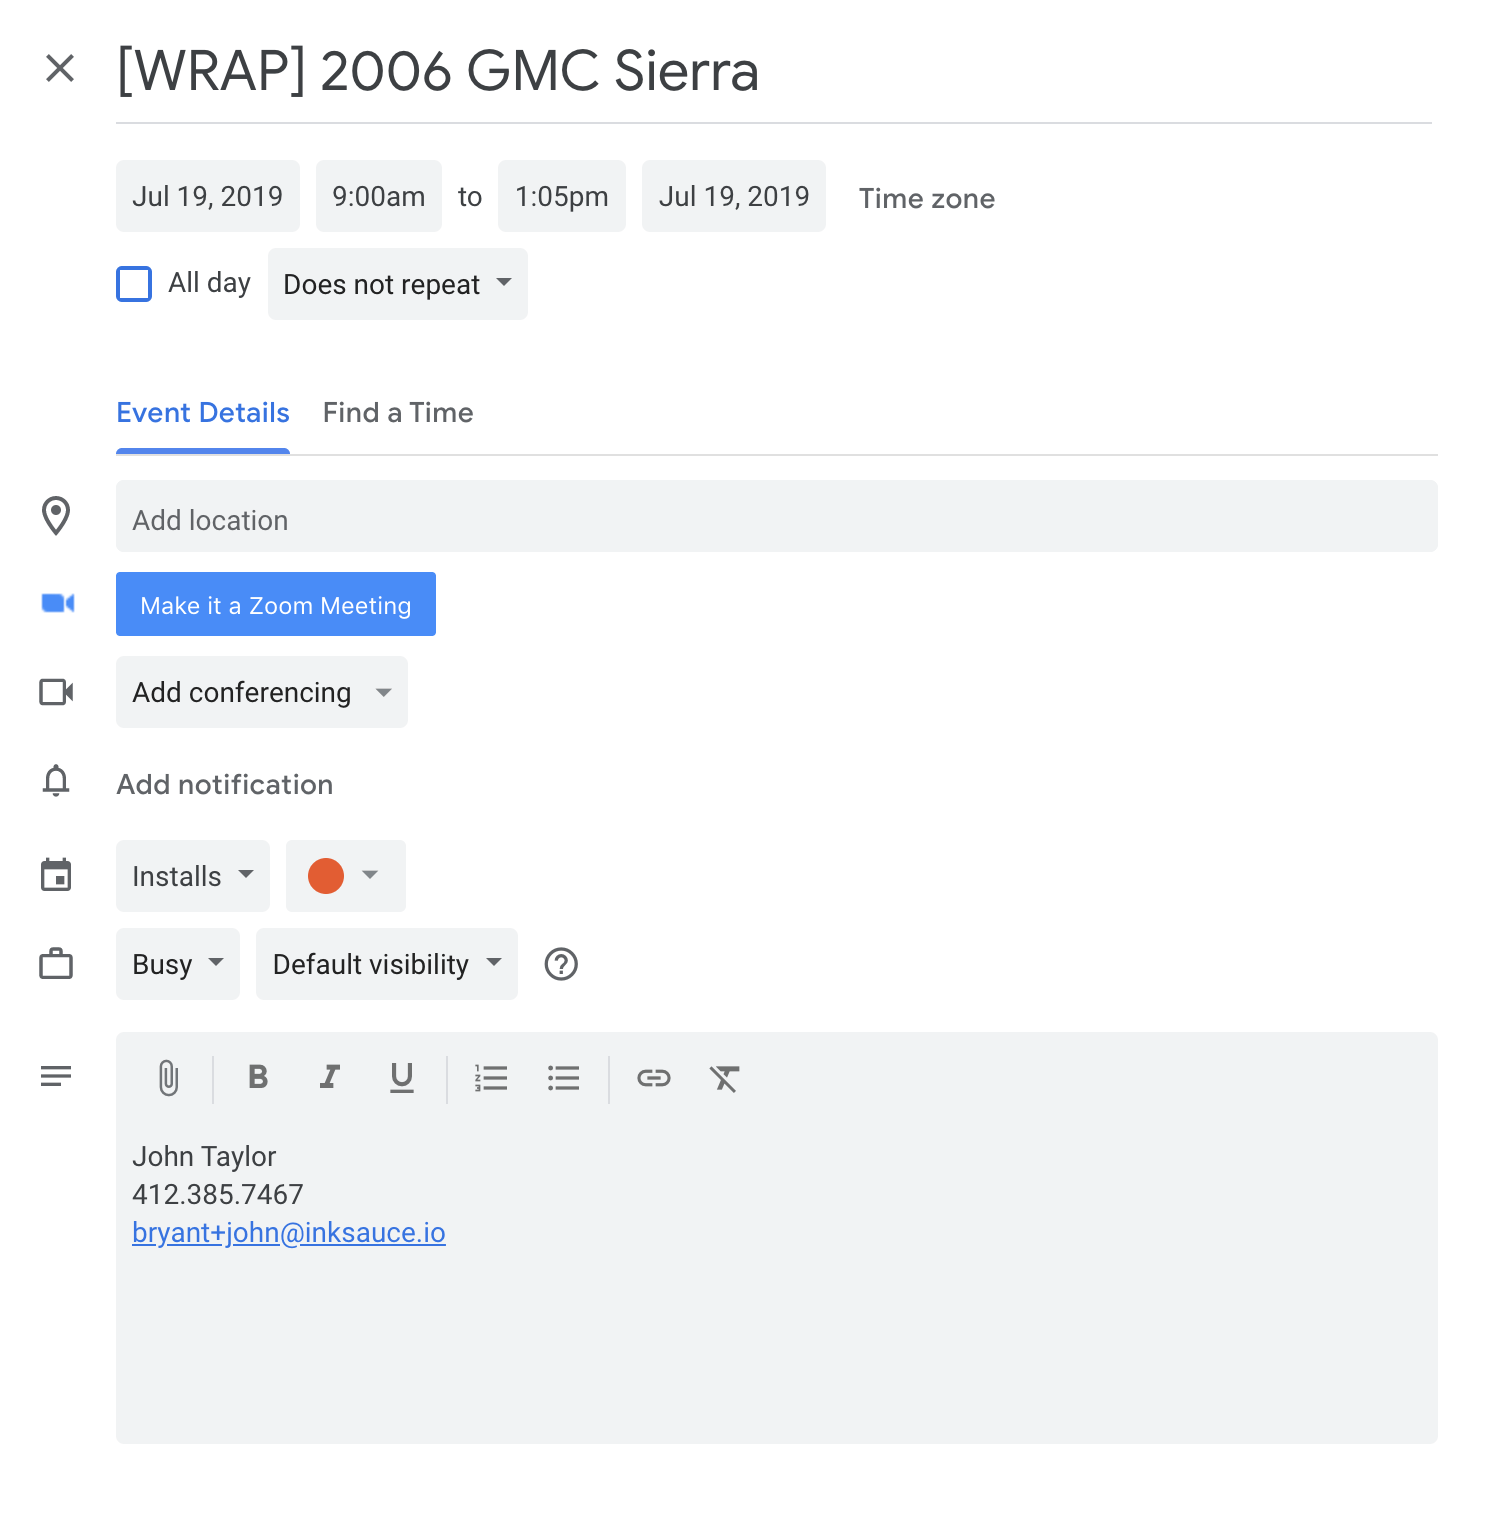
Set the date and time for this install event to within 1 day of your current time.
This is just so you can get proper data to test with when you create the automation.
For the title, use something like: [WRAP] Customer Name - Vehicle
Inside the description, use something like:[First Name] [Last Name]*Required
[Phone Number]
[Email]
Of course, you can add any other details you need. But you've definitely got to have the phone number in there.
Use your own phone number when setting this up so you can verify the message is being received.
You're going to use that Description field in the coming steps.
Step 2. Twilio
Sign up and login to your Twilio account.
If you haven't signed up for Twilio yet, you'll need to do that now.
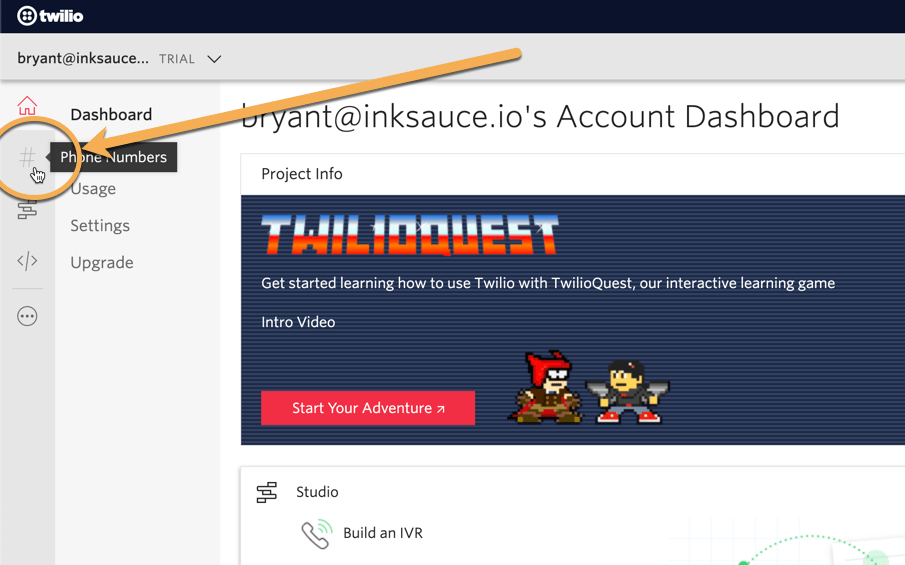
When you login, look for the Phone Numbers section of the left-hand navigation.
You'll have to create a phone number to send texts from to use in our automation.
Get your Twilio Number
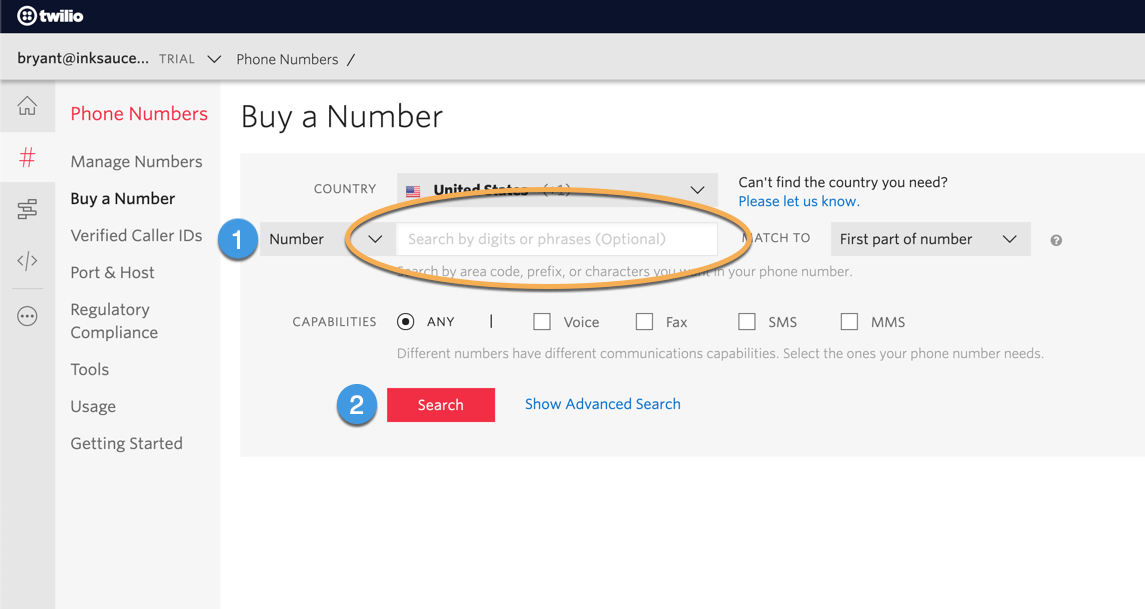
On the Buy A Number page, enter your local area code and press Search.
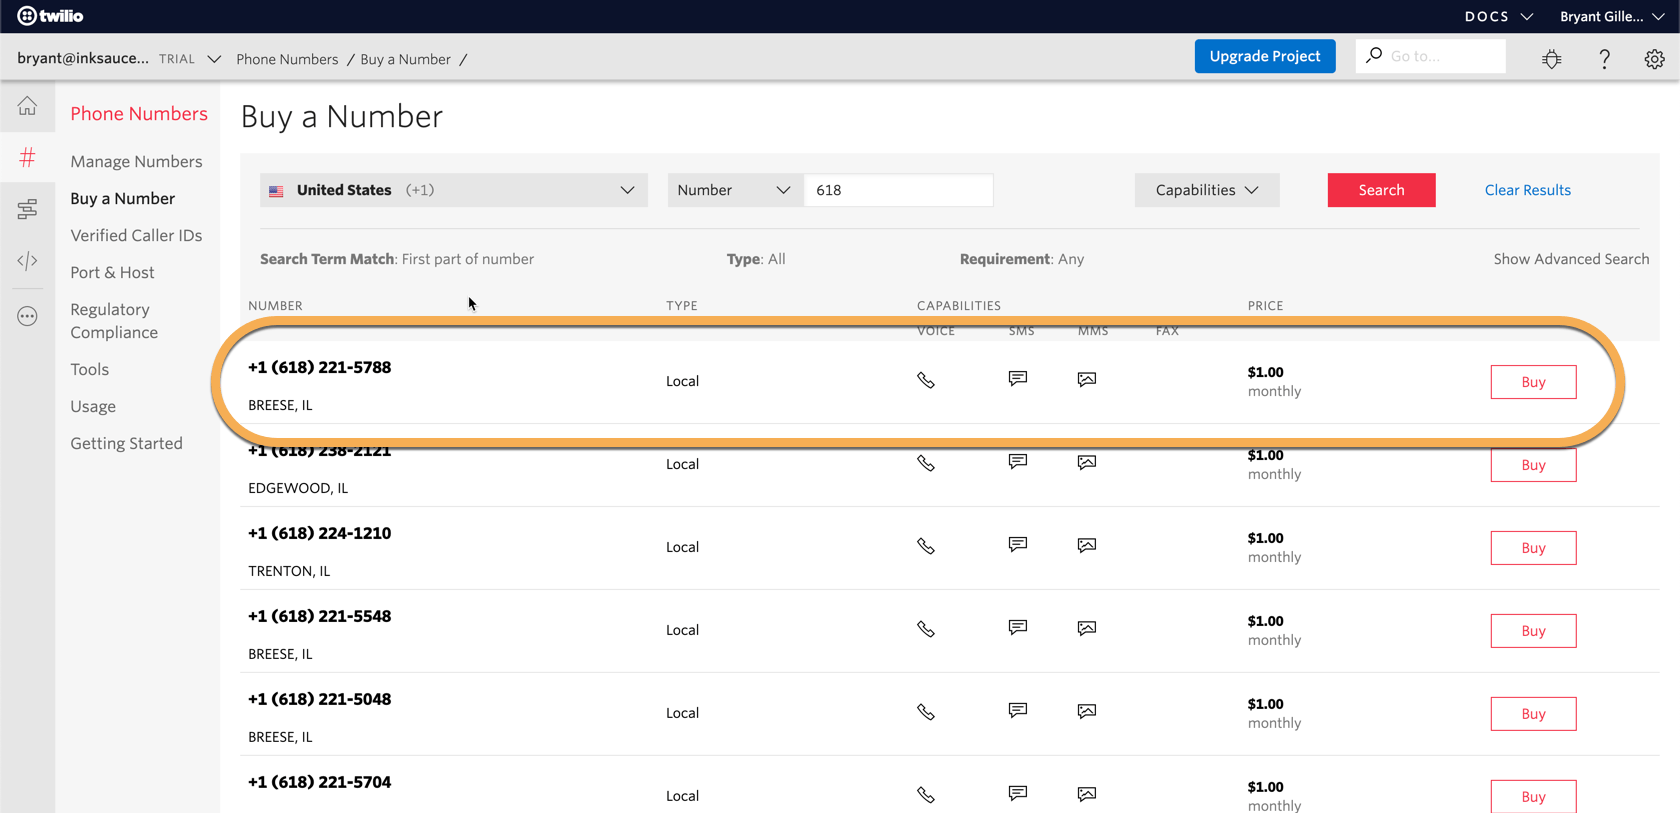
Once you find the number you want, click Buy.
When you are on testing things out on the free trial, Twilio usually provides your first number free of charge.
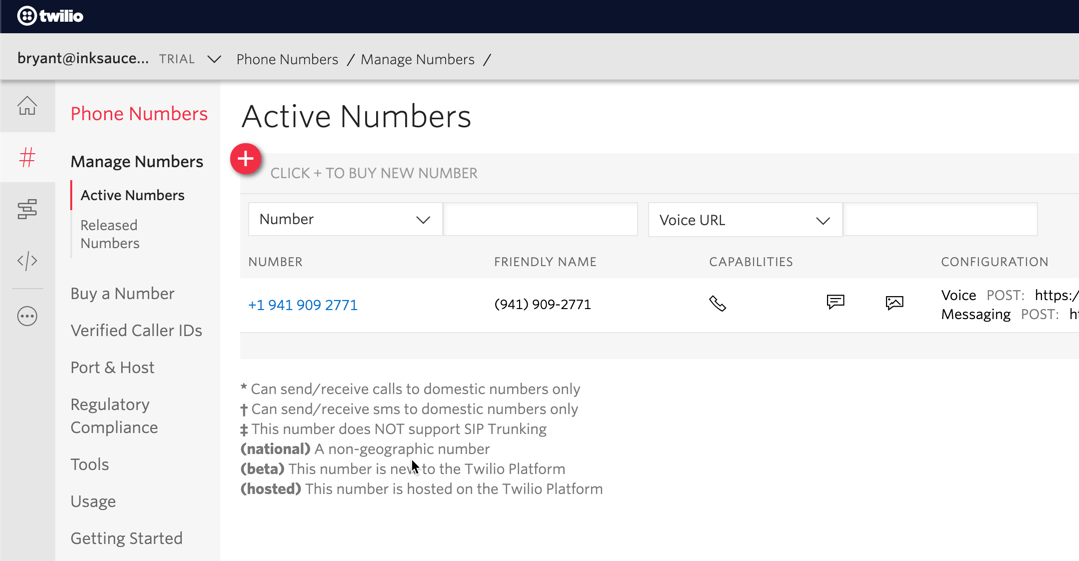
Once you've got your phone number, you're ready to move on 👍
Step 3. Zapier
If you haven't already created that account at Zapier, again you'll need to do so now.
Create your Zap
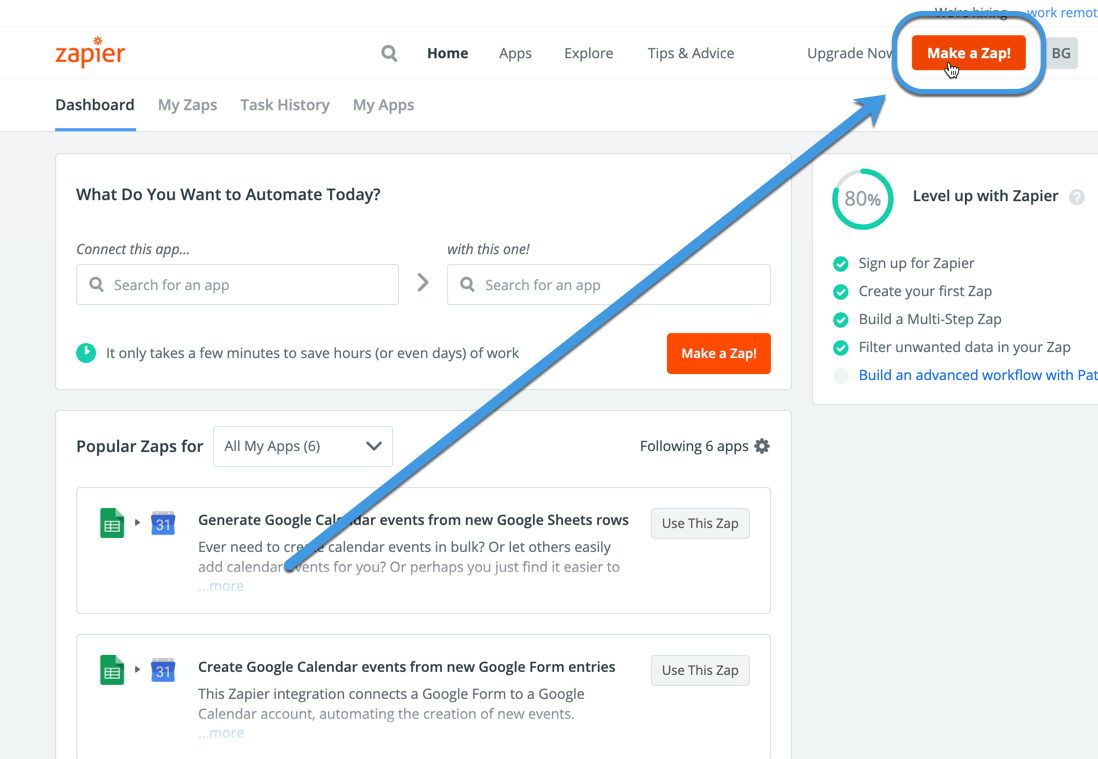
Login to Zapier and click Make a Zap from the top-right hand side of your screen.
Configure the Trigger Step
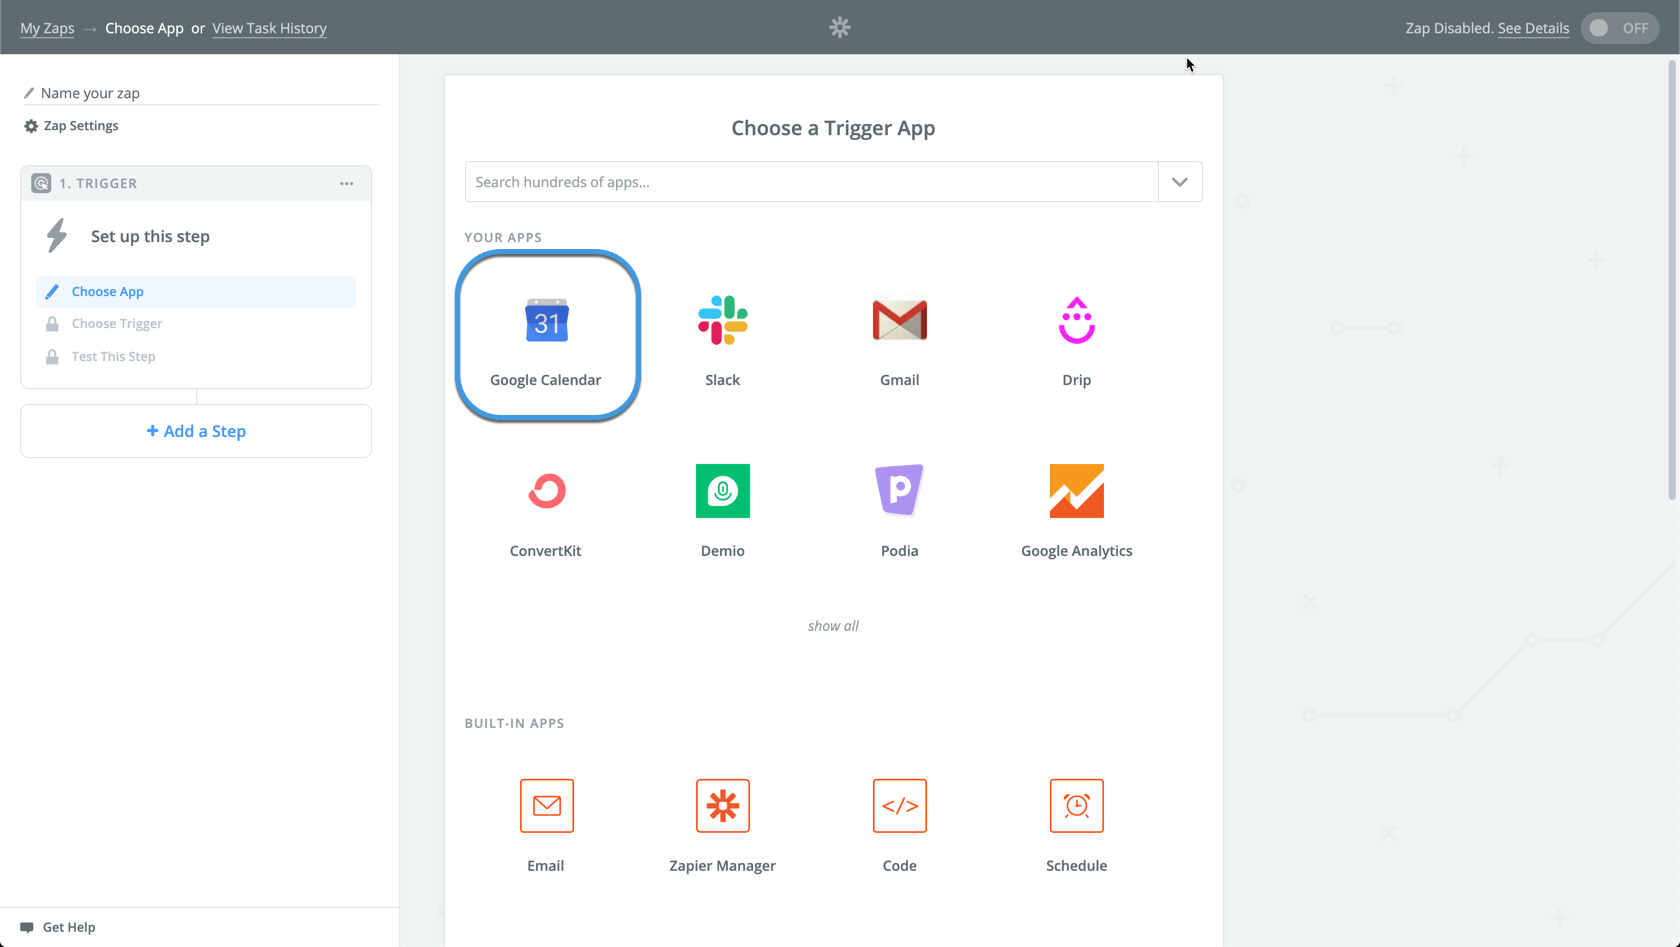
Triggers are the events that kick off of your automated workflow.
Search for Google Calendar and select it as your Trigger App.
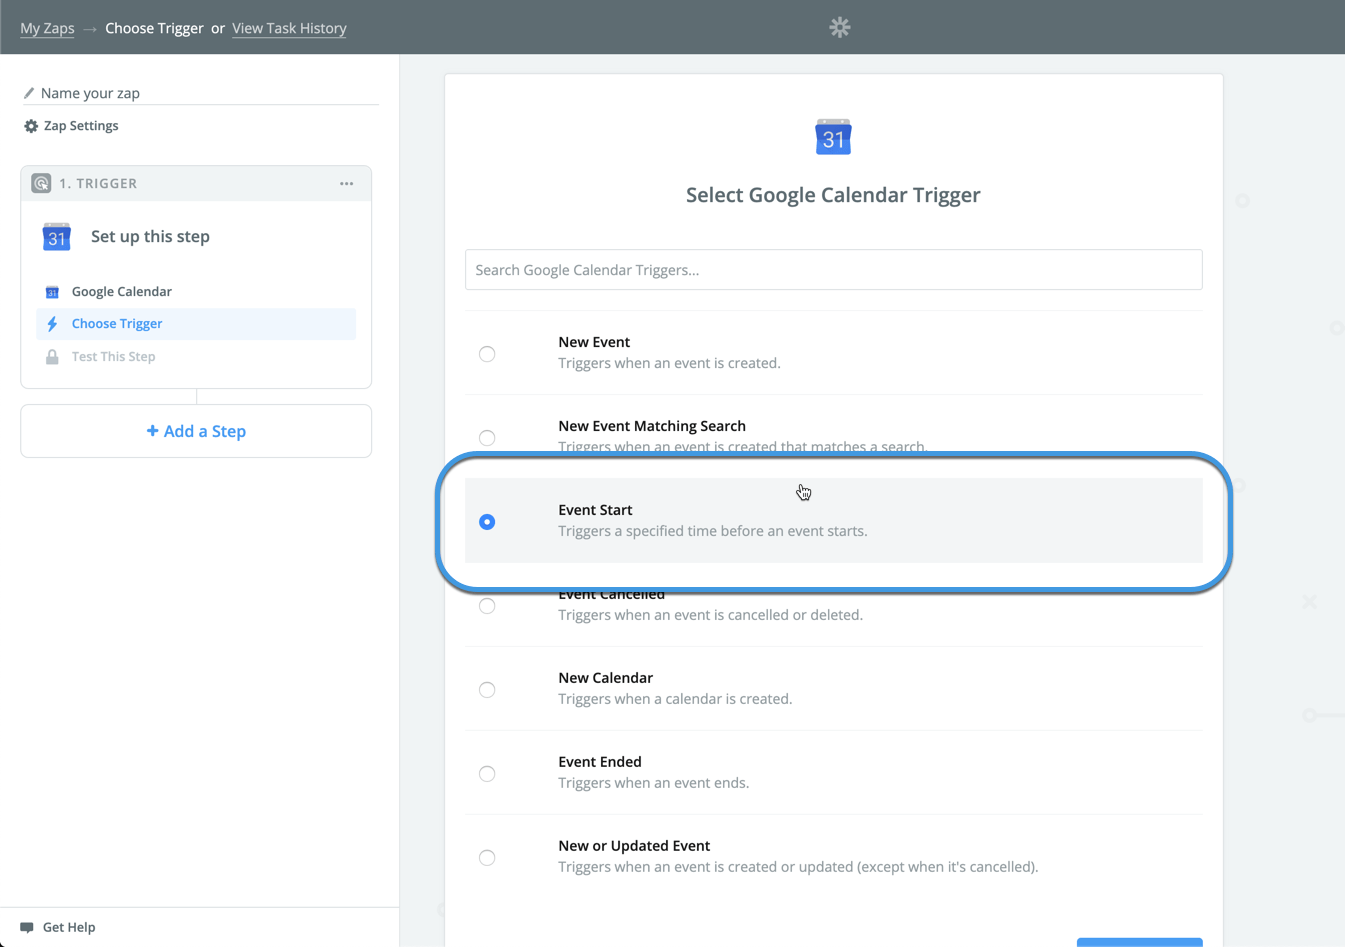
Next for the actual trigger choose the one called Event Start.
This one trigger will start the workflow a set time duration before the install is supposed to start.
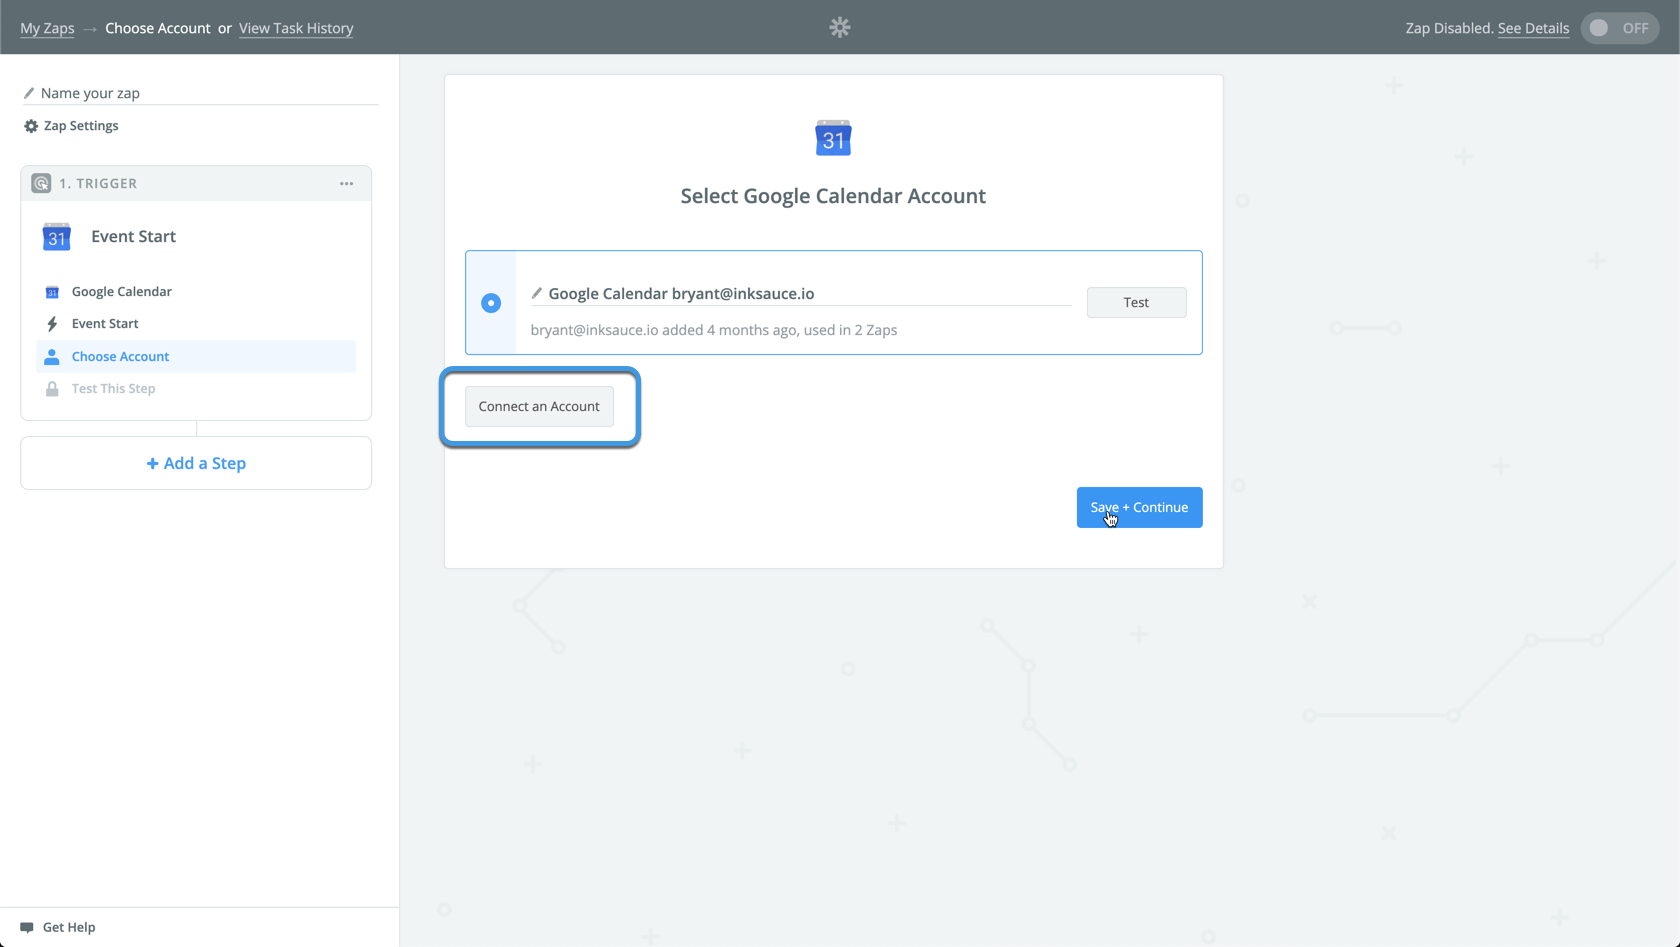
Connect your Google Calendar account to Zapier.
This allows Zapier to start pulling in data from Google Calendar.
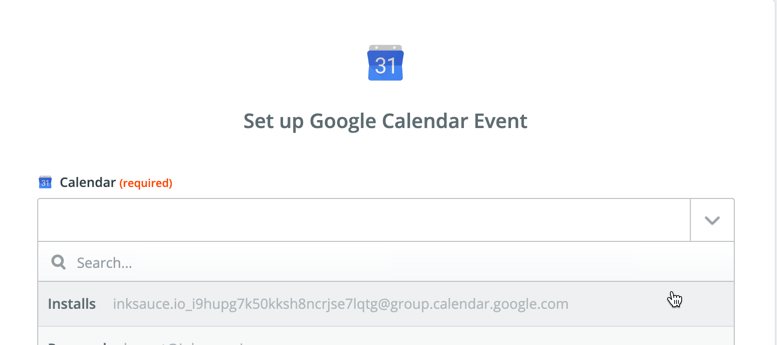
Choose the calendar you created your install event.
I had created a separate Install calendar in Google. You can do this as well or just use one of the existing ones in your account.
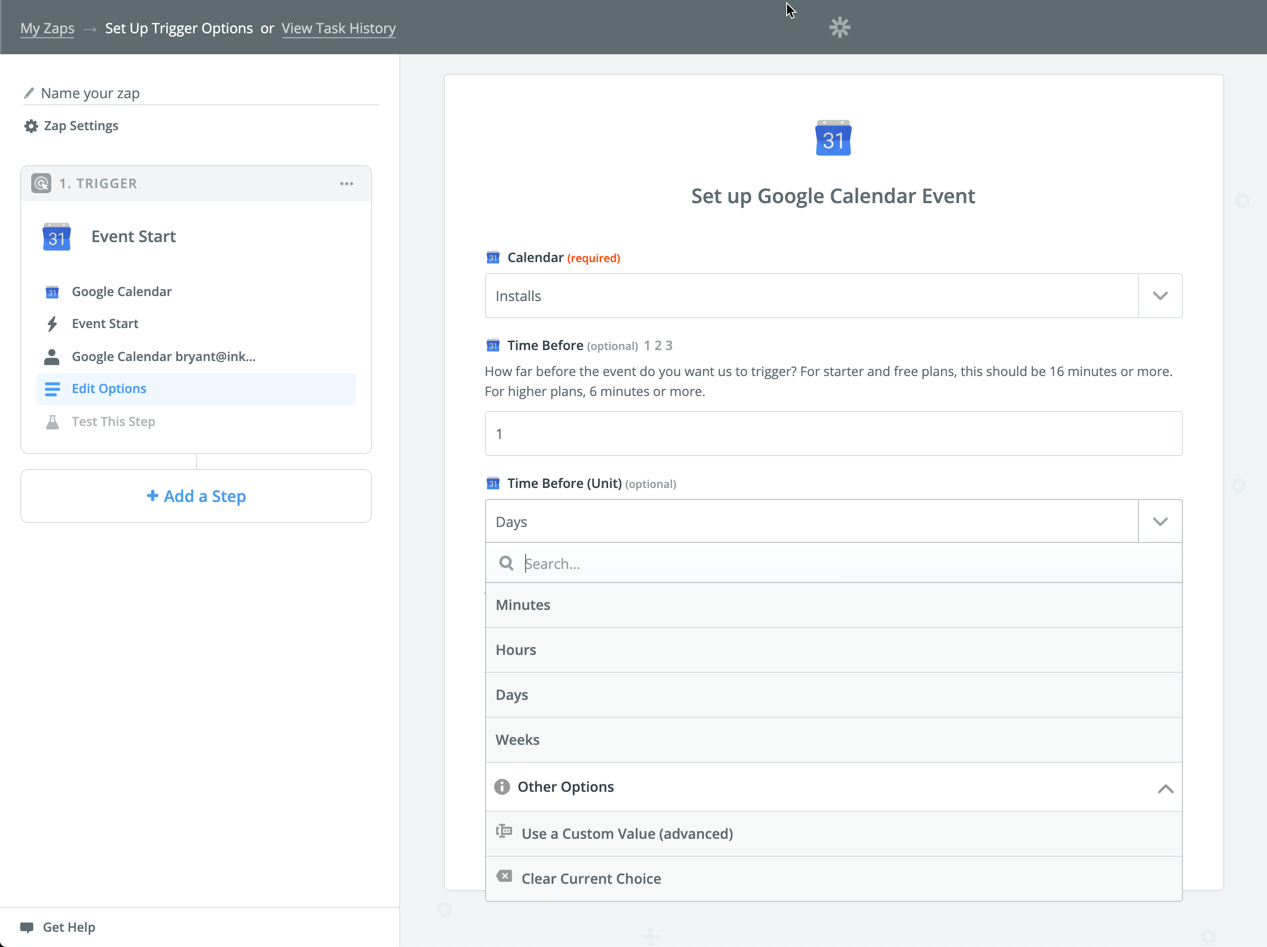
Configure the remaining options for the trigger.
I wanted this notification to be delivered 1 day before the install so I set it up like this.
Time Before = 1
Time Before (Unit) = Days
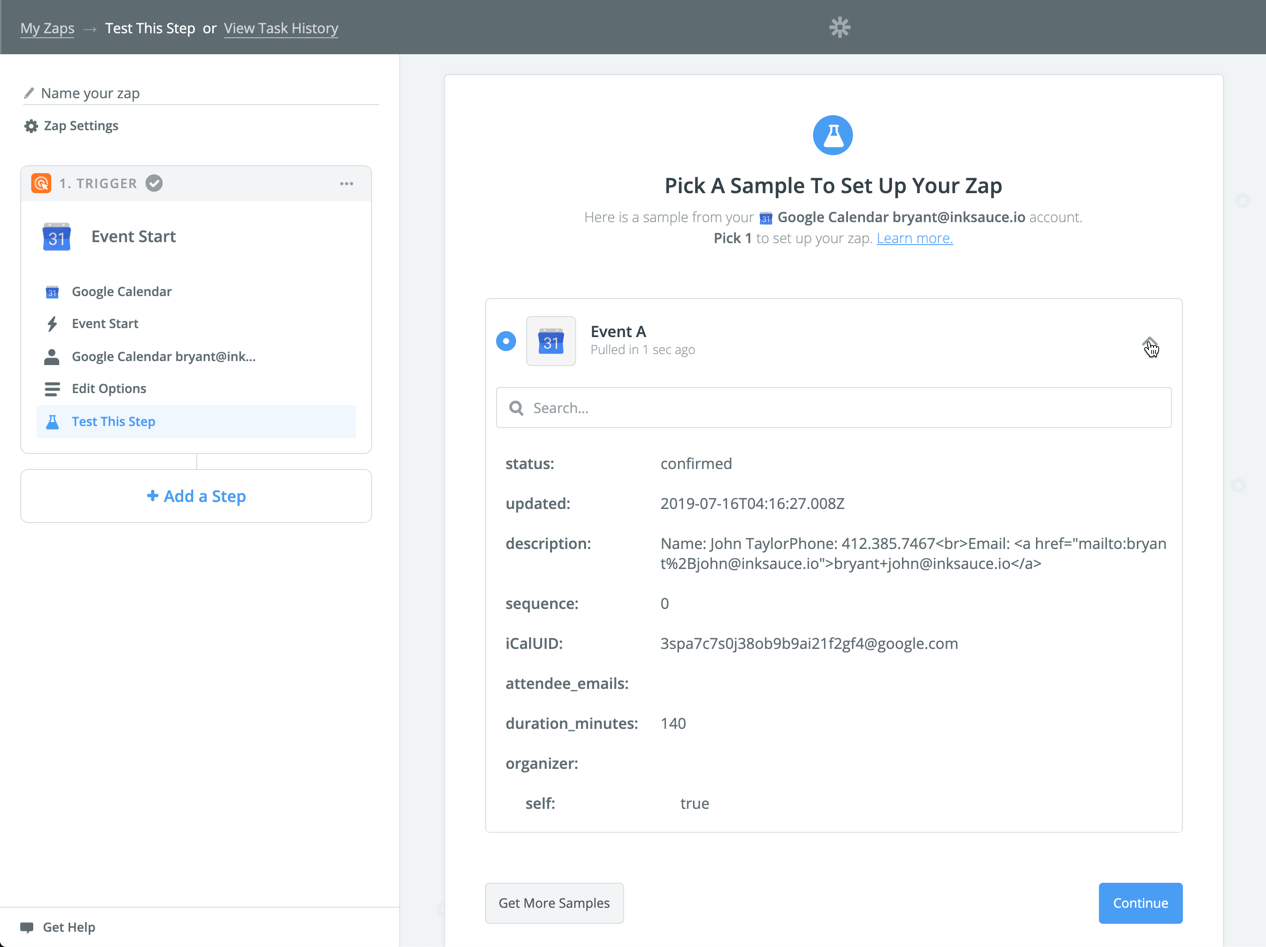
Once you've got the options setup, click Continue and then Get Samples.
It is important to make sure the event you created is within 24 hours of the current so that Zapier will pull the test event data correctly.
Once you've got the event data, proceed to the next step.
Extract the Phone Number using Formatter
Zapier has some built-in apps that help you manipulate data pretty easily without having to write custom code. For non-developers like you and me, this a great tool.
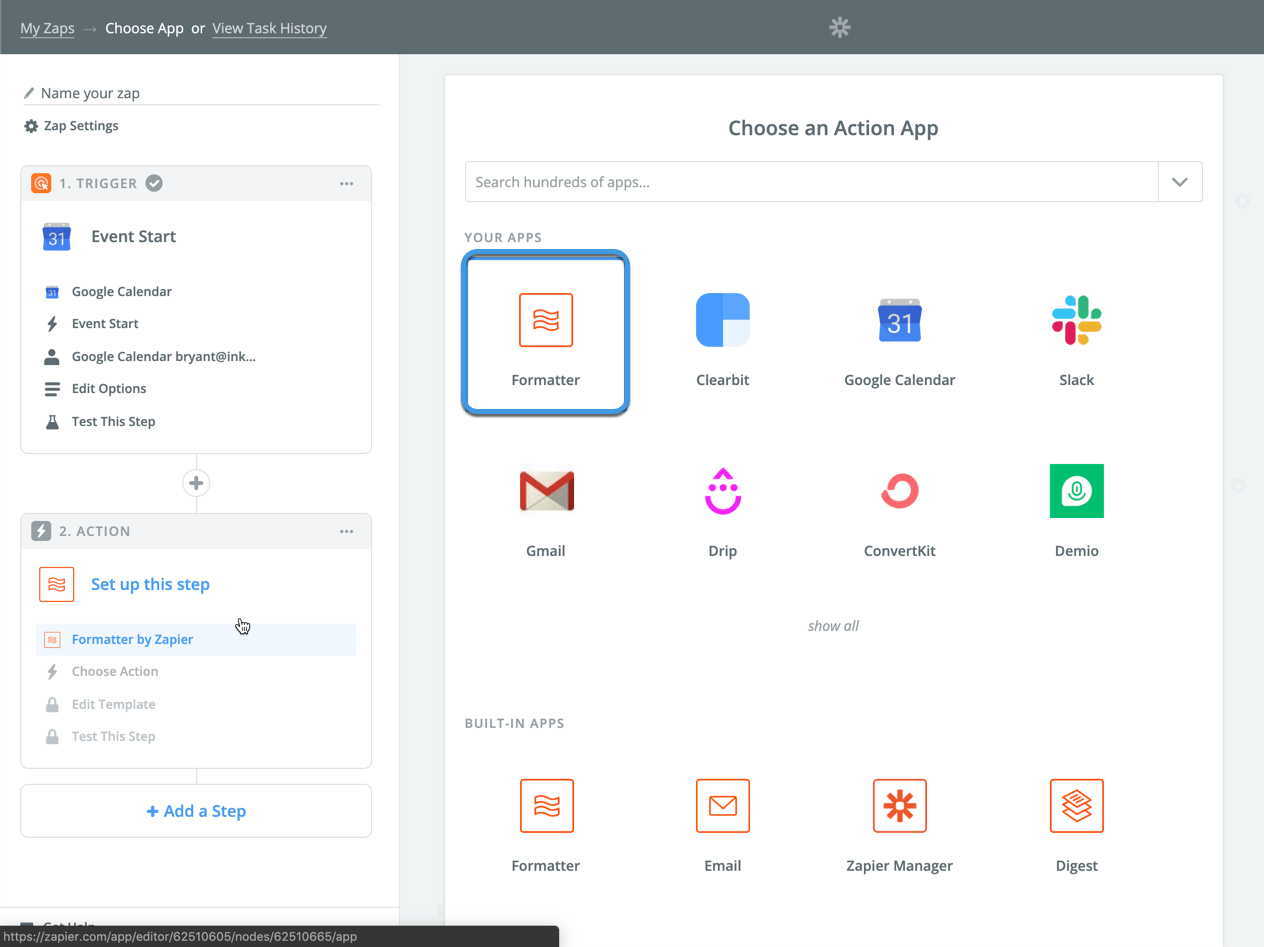
For 2. Action, search for the "Formatter by Zapier" app.
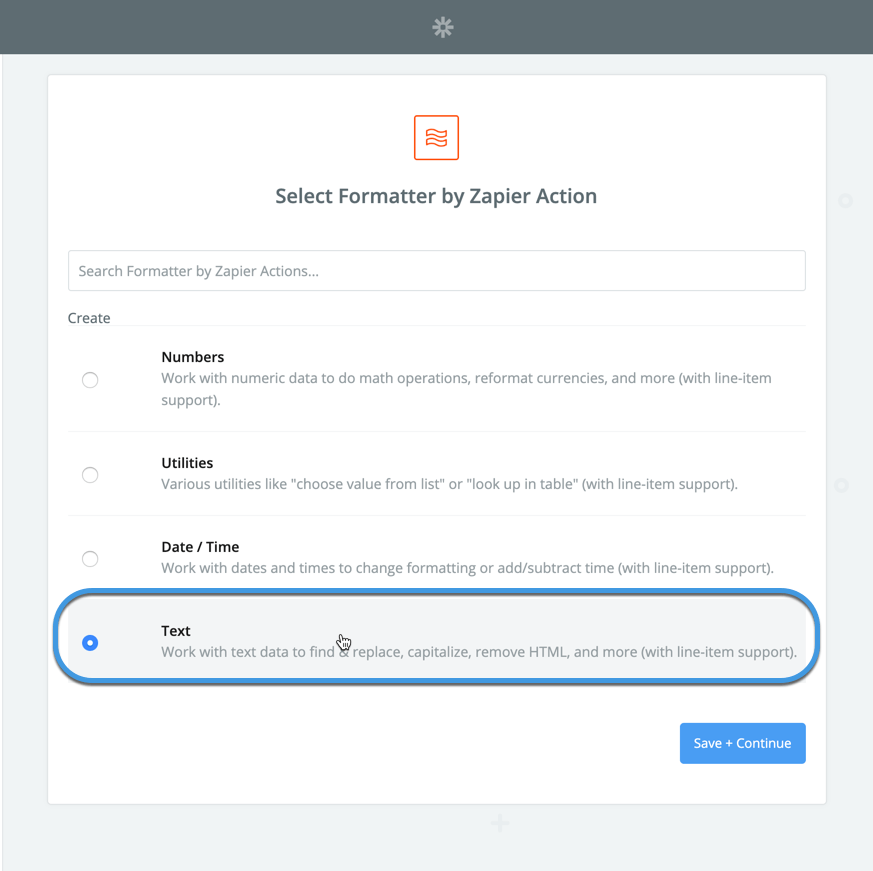
For the actual action, select Text from the Create list and then Save + Continue.
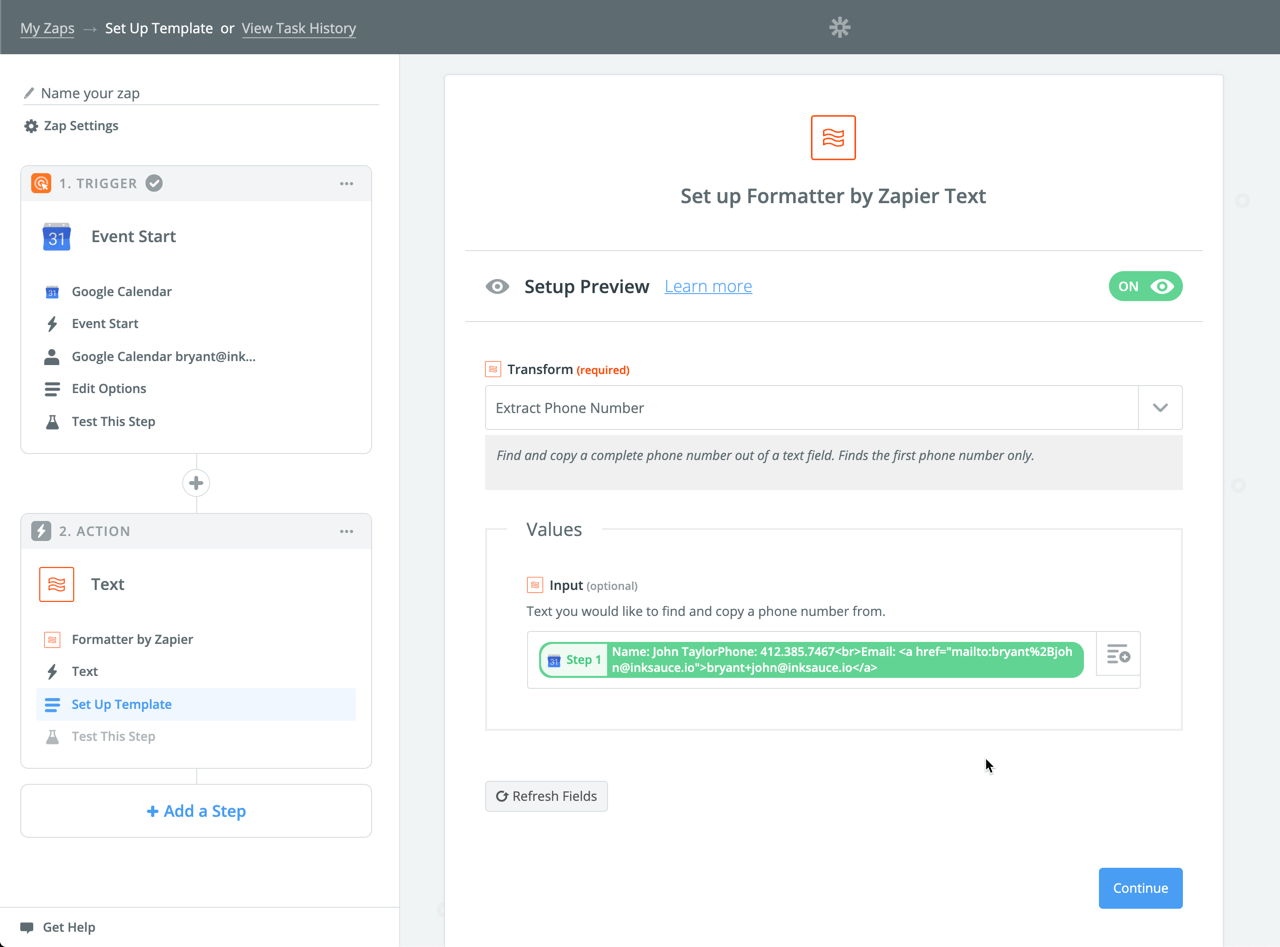
From the Transform dropdown, select Extract Phone Number.
This utility will scan the field we tell it to and bring back any phone numbers.
On the Input section, click the button to the right and select the Google Calendar event Description field from Step 1.
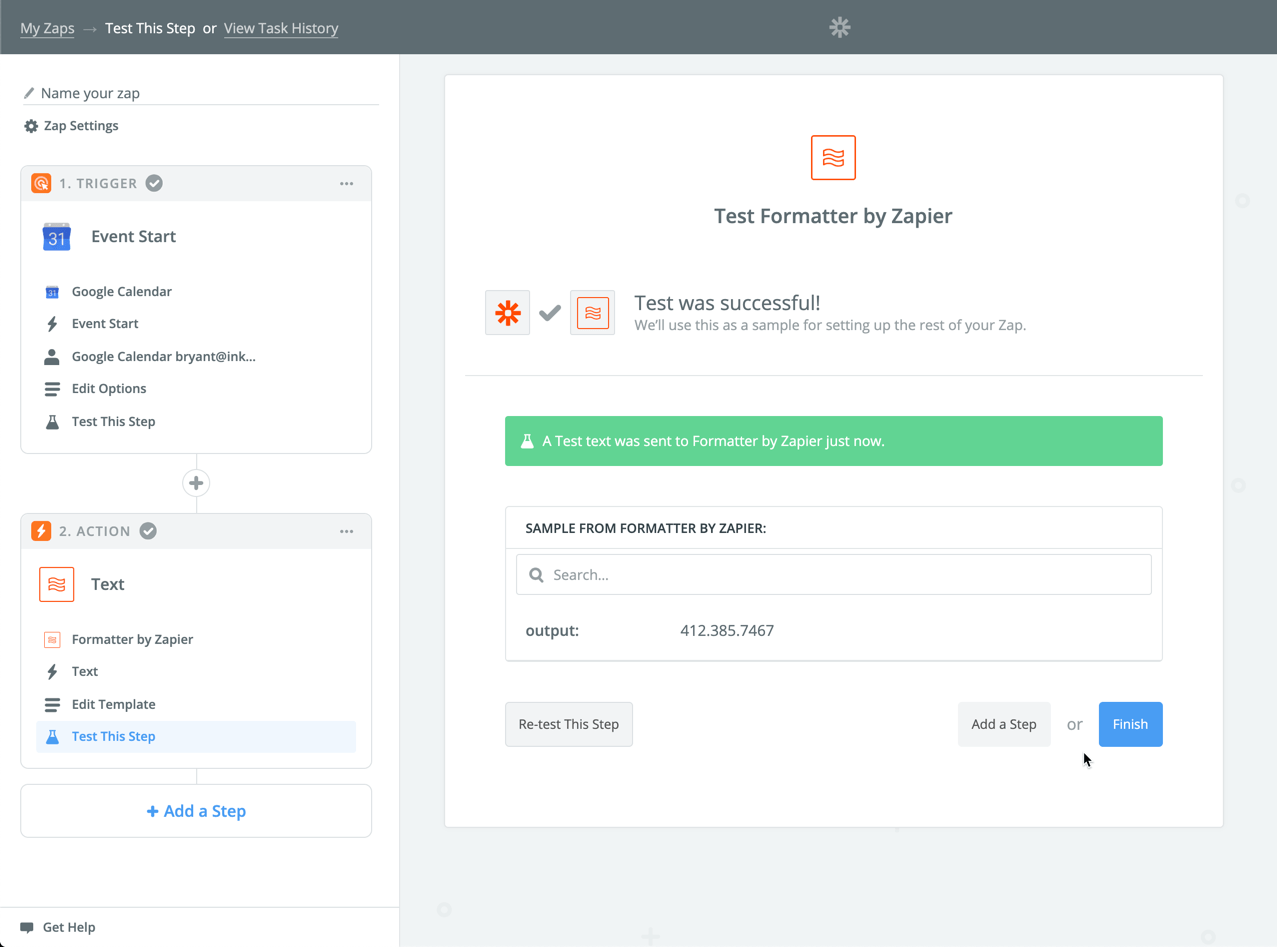
Make sure you test to make sure the phone number was output correctly.
Setup the Customer Text Message with Twilio
You're almost there 🙌
Below 2. Action on the left, click the Add a Step.
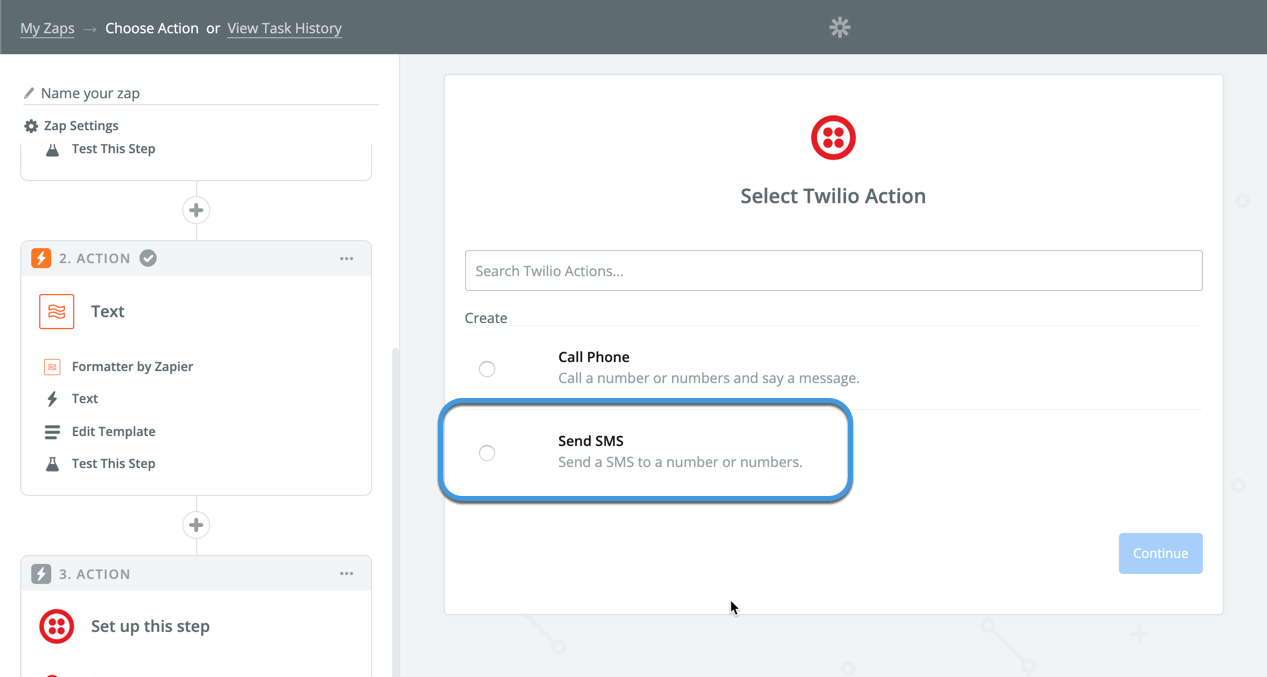
Search for "Twilio" and select it.
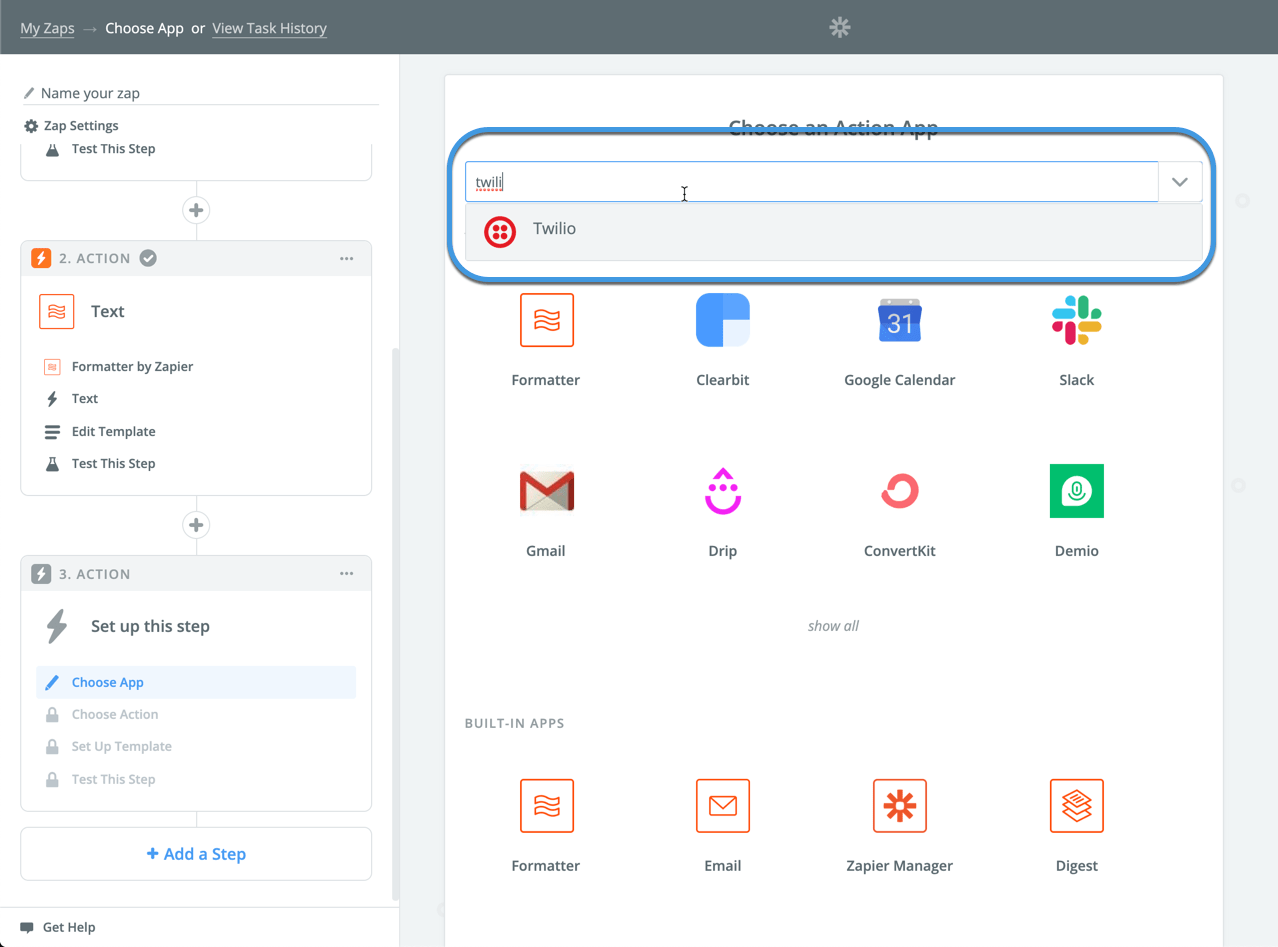
Choose Send SMS for the Action.
You'll then have to connect your Twilio account.
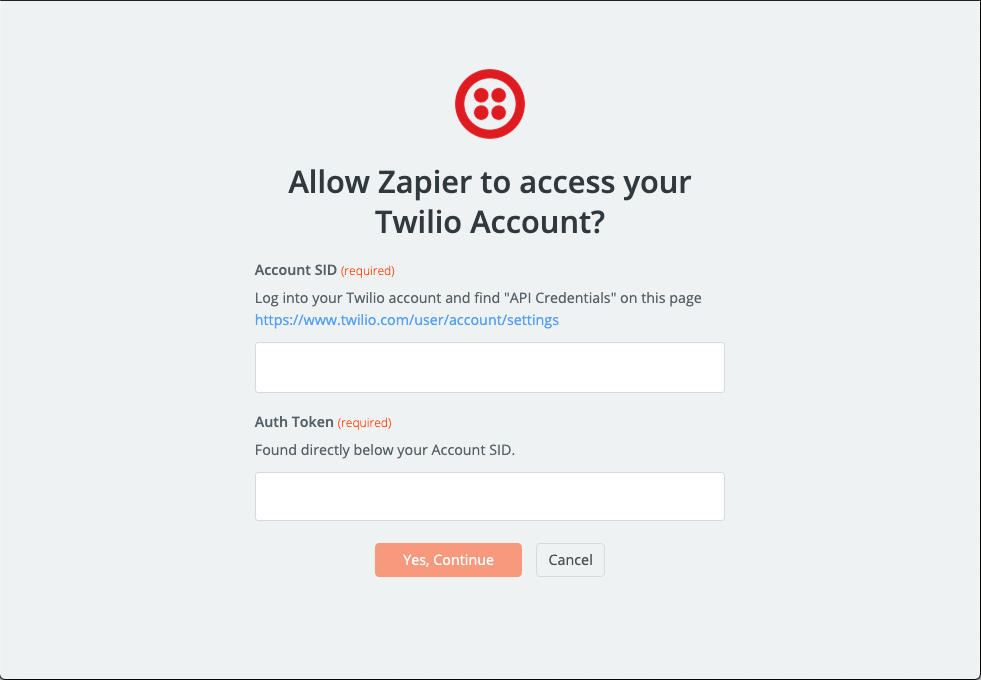
Use the link provided by Zapier to find your API Credentials inside your Twilio account.
Copy and paste them into the Zapier window.
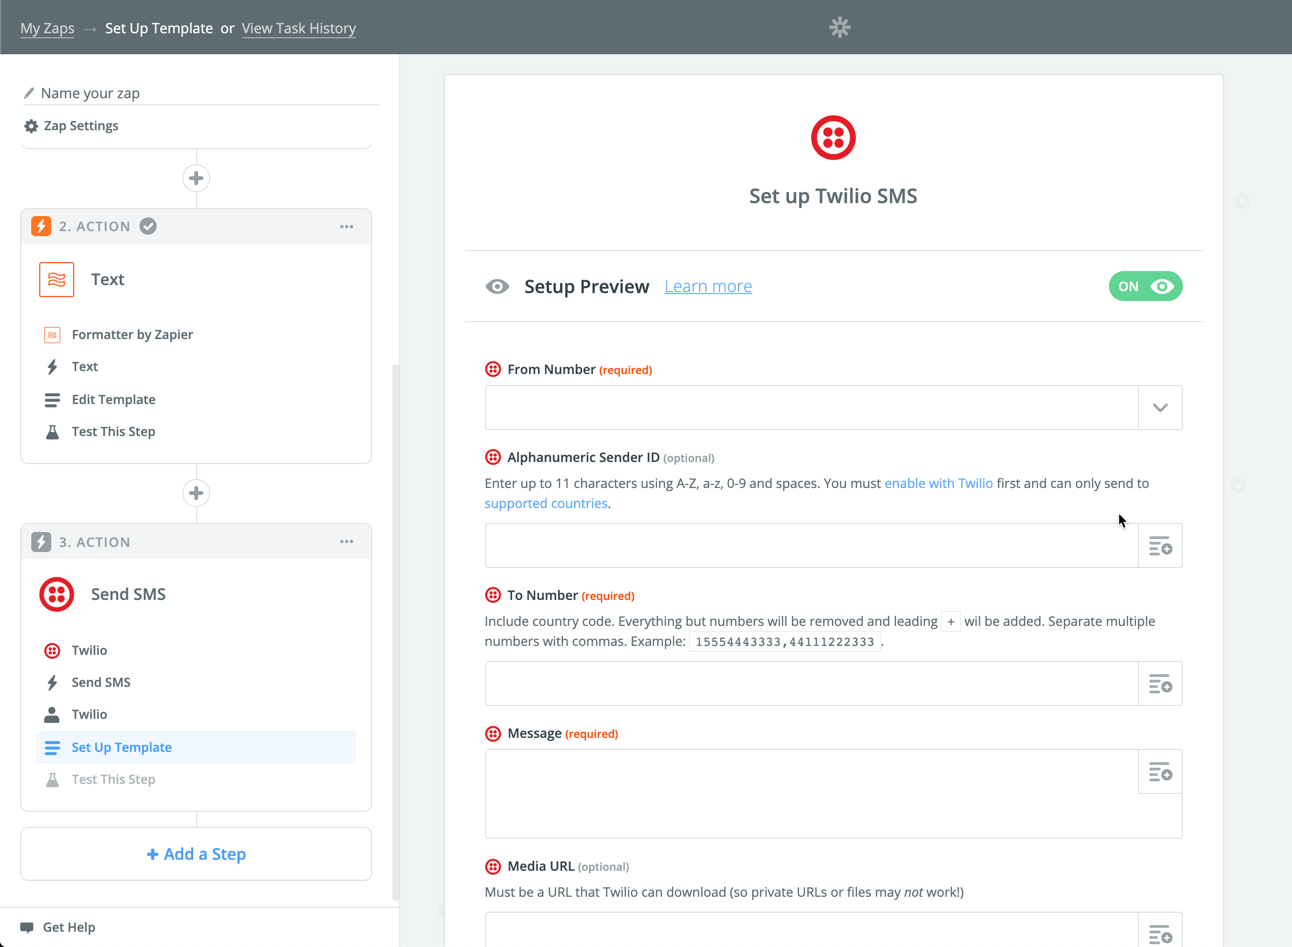
Next fill out the Template for the Twilio text message.
Here's what to enter for each field.
From Number - should be populating from Twilio, so just pick the number you setup.
Alphanumeric Sender ID - leave this blank
To Number - Click the button on the right and choose the output from Step 2.
Message - Input the message that you'd like to send to your customer here. Remember this is a text so keep it personable.
Media URL - leave this blank
Send Large Messages - If your text is over 160 characters, then change this to "Yes"
Here's the sample message that I used.
Hey it's Bryant from Wrap City 👋

Just wanted to let you know we've got you scheduled for install tomorrow.

Please have the following ready when you come to drop your truck off tomorrow...it really helps the process goes much smoother.

1. Wash your vehicle and clean any debris
2. Bring the remaining 50% balance as cash or check.

Thanks and see you tomorrow!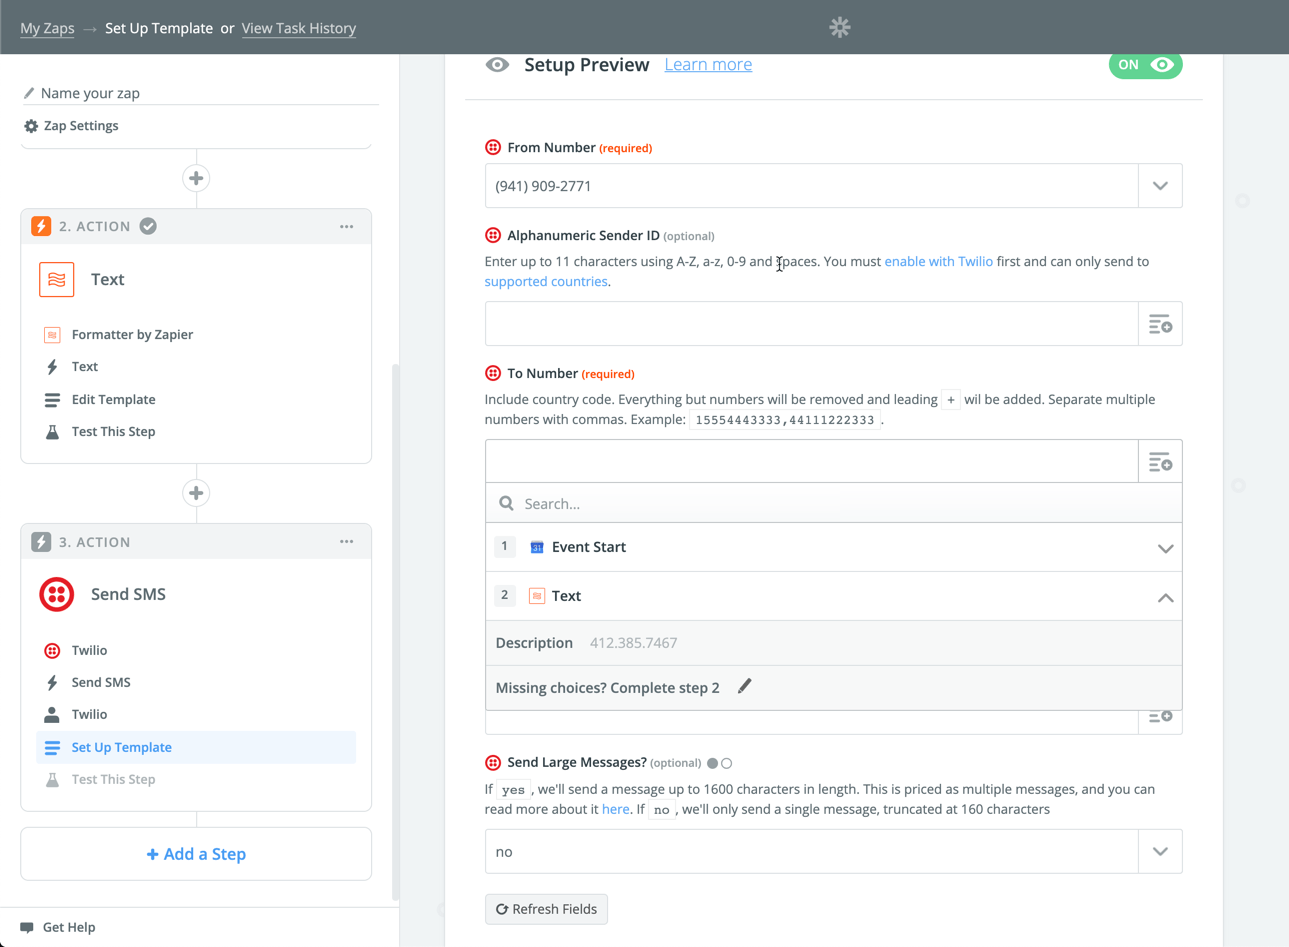
Last you'll want to test this out to make sure it's working correctly.
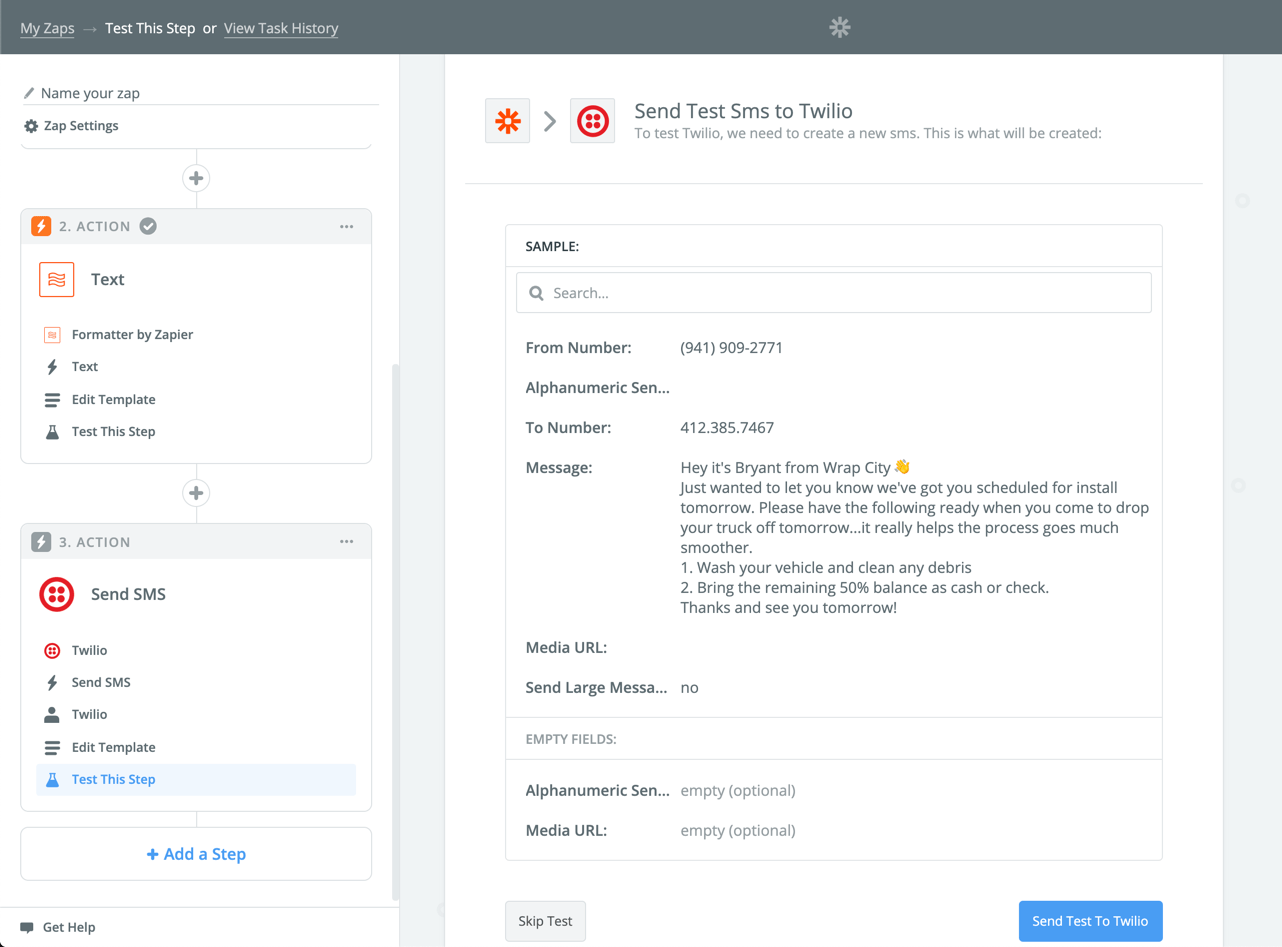
Click Send Test to Twilio to send the intial test message.
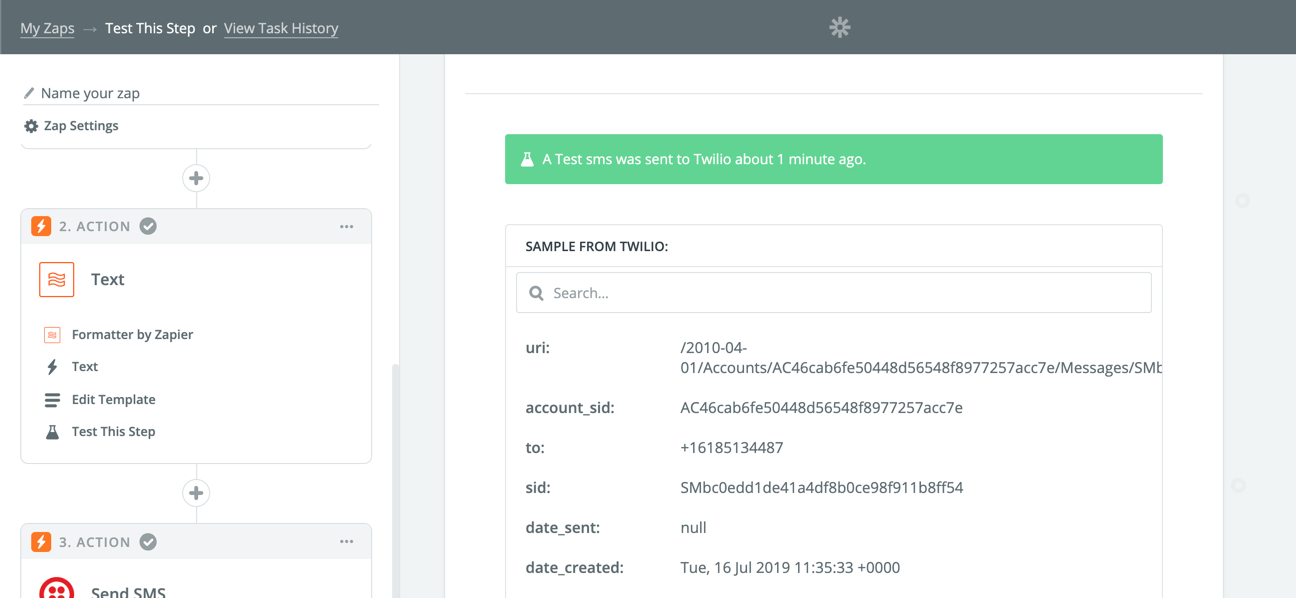
You'll get a confirmation from Zapier and you should also receive the message on your cell phone within a few minutes.
Once you're satisfied with how everything is looking, give your Zap a solid name and turn it on clicking the toggle switch.
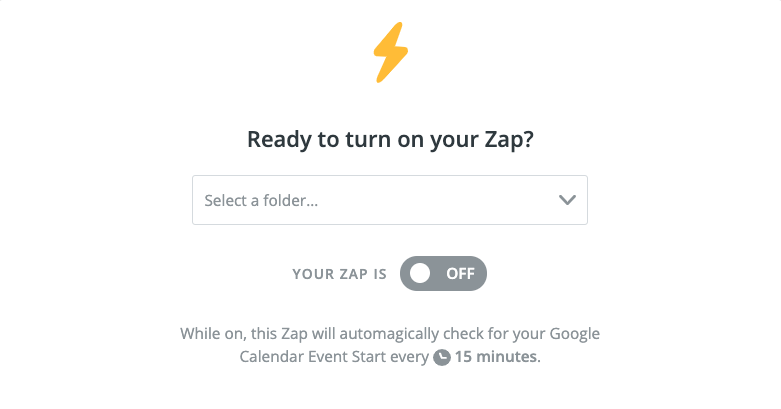
And voila! That's it. Now've you set up a sweet automation that will text message customers for you 1 day before their scheduled install to remind them of any prep work they need to complete.
What's next?
Now that you've learned the power of Zapier and how you can use it to automate mundane, often forgotten tasks, you might want to see what else you can automate.
Want more tutorials like this one?
Make sure you subscribe to receive our updates. Our newsletter subscribers get first crack and any new guides and exclusive content and offers. You'll find the opt-in below.

